Are you a magnetic lash convert?
If you have never put on magnetic lashes before, then this post is for you.
In this post, we will cover the essential steps for you to put on a pair of magnetic lashes. By the end of this post, you should be able to put on magnetic lashes like a seasoned magnetic lash convert.
First, Conduct a skin Allergy test
Why do you need to conduct a skin allergy test?
To be extra safe. That's why.
Even though magnetic lashes are not as harsh as glue. And even though we have hundreds of customers and not a single complain when it comes to skin allergy. It is still good practice to conduct an allergy test to keep our precious eyes safe.
To conduct a skin allergy skin test, follow the procedure below.
- Open the magnetic eyeliner bottle.
- Draw a line on the back of either your left or right hand.
- Wait for 30 mins. Did you observe any redness or soreness?
- Wait for 8 hours. Did you observe any redness or soreness?
If there is no reaction, you pass the allergy test.
#1 apply eye Primer to lids
Our liners are wind proof, smudge proof and water proof. BUT...they are not oil proof!
Everybody's skin produces oil. Even for those that do not have oily skin. Oil is a natural process. It moisturises our skin.
Priming your eyes with an eyeshadow eye primer (or concealer) controls oil build up on your eye lids. This ensures the liner and lashes last longer and holds stronger for the whole day.
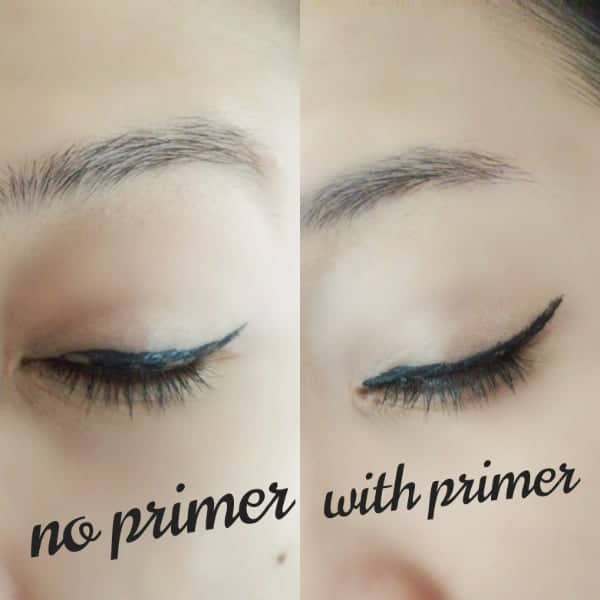
#2 put on your eye makeup first
Similar to normal glue on false lashes. You apply your eye makeup before applying the magnetic lashes.
You can use your usual, non-magnetic eyeliner if you want. Mix up the colours. Add some glitters. Make it sparkle. Let your creativity shine.
When you are done, just make sure the magnetic eyeliner is the finishing coat on your lash line. This ensures magnetic bonds between lashes and liner reminds strong.
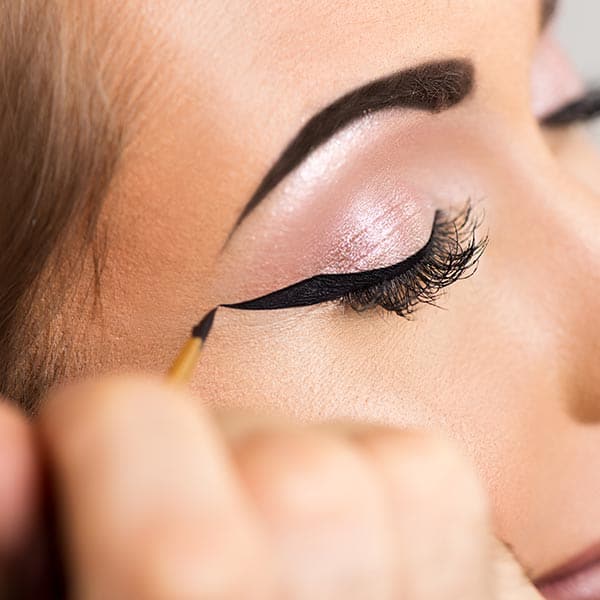
#3 Understand Where The Magnetic Lash Will Sit On Your Lash Line
From the picture below, you will notice the area highlighted in blue is covered by skin. If you wear the magnetic lashes within the blue area, it is going to be uncomfortable for you.
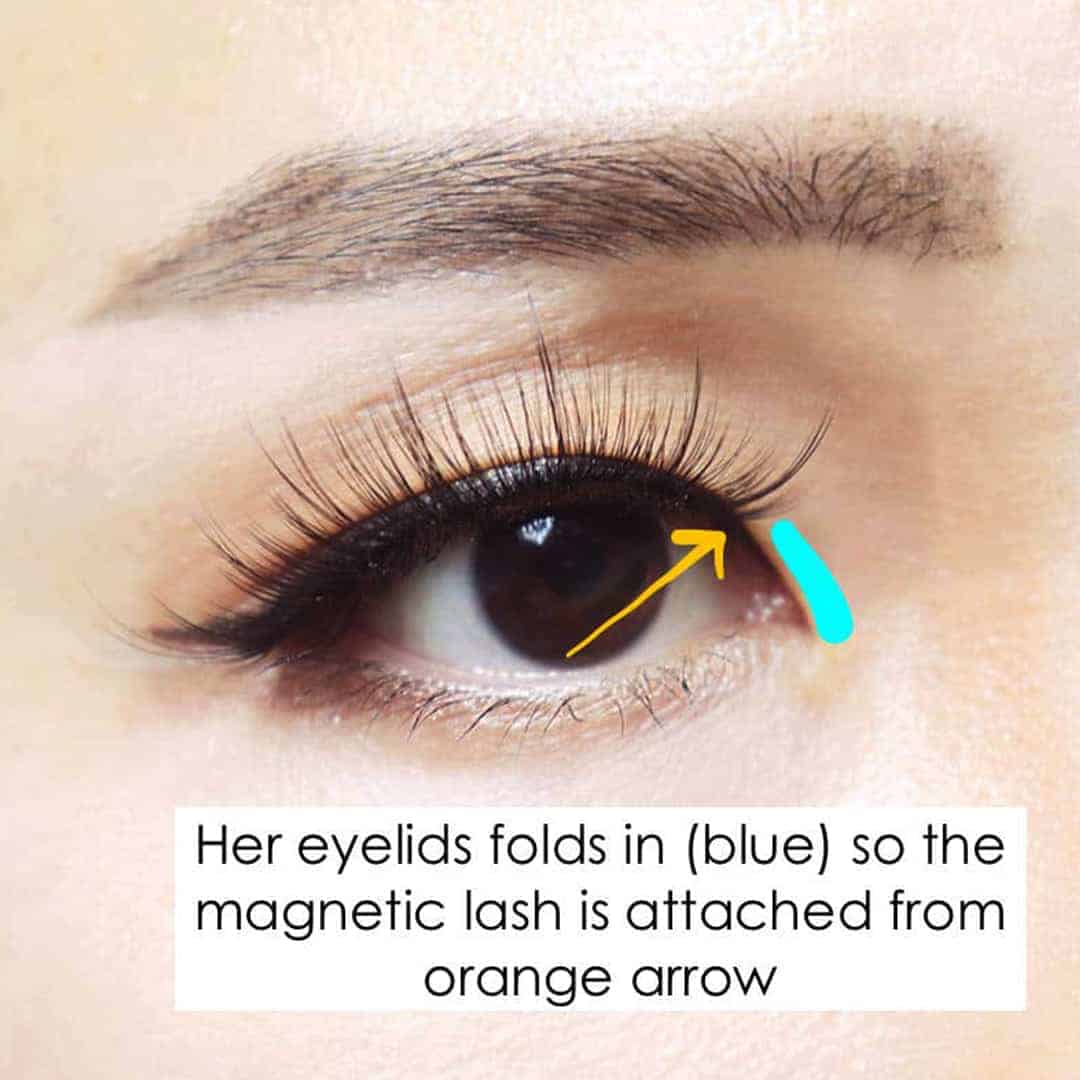
The correct location where the lashes should sit is from the yellow arrow onwards to the outer eyes.
Most eye shapes are different. Your eyes may not look the same as per the picture above. The key point is to identify, if any, where the skin folds in on your lash line. This should be the starting point where the magnetic lash sit.
#4 Apply the Magnetic Eyeliner
Shake the bottle before use, unscrew the cap, and then apply the magnetic eyeliner as close to your lash line as possible. This is where your lash band will latch onto, beautifully camouflaging your lash band!
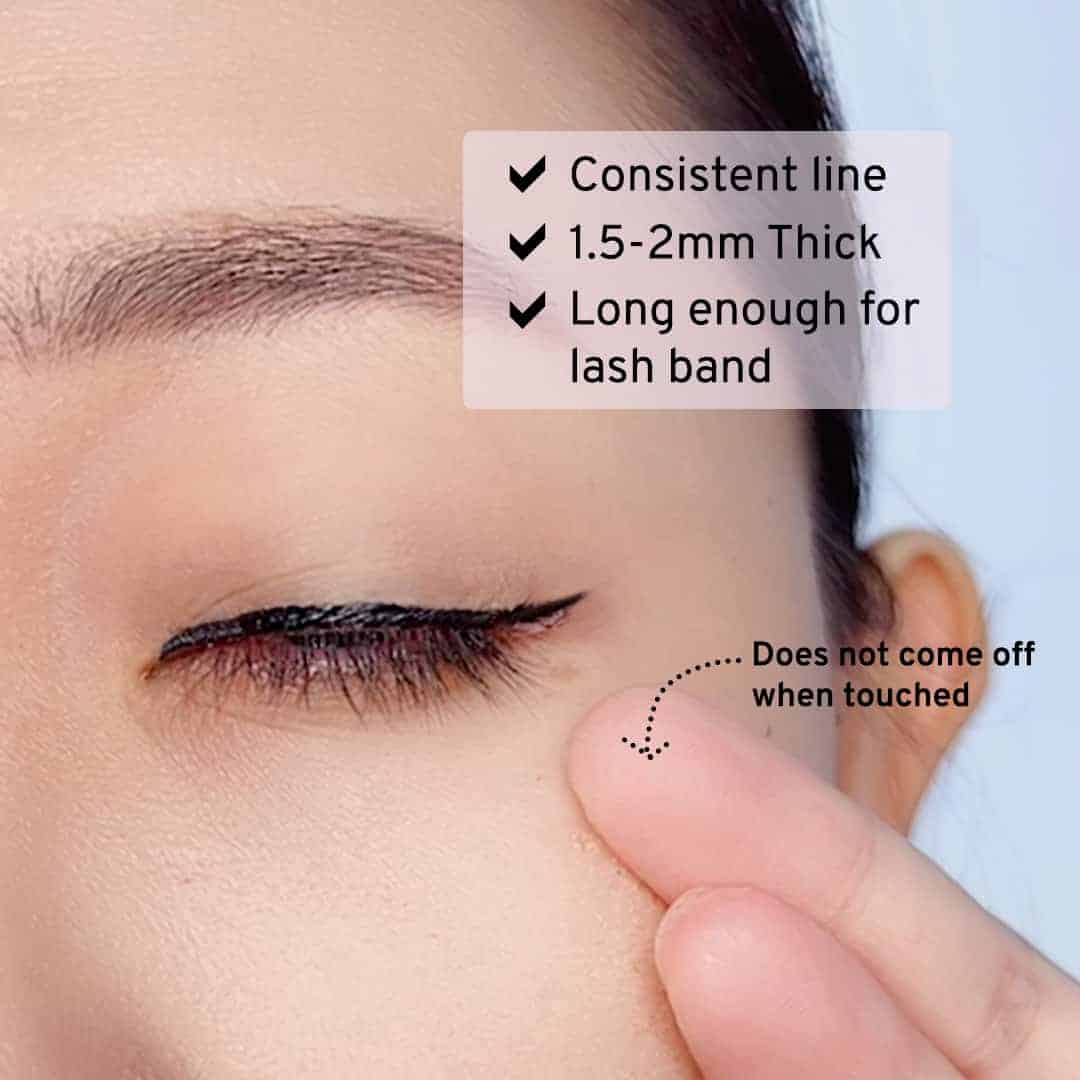
We recommend aiming for a thickness of 1.5-2mm if this is your first time. Also, ensure the liner is long enough to cover the full length of the lash bands.
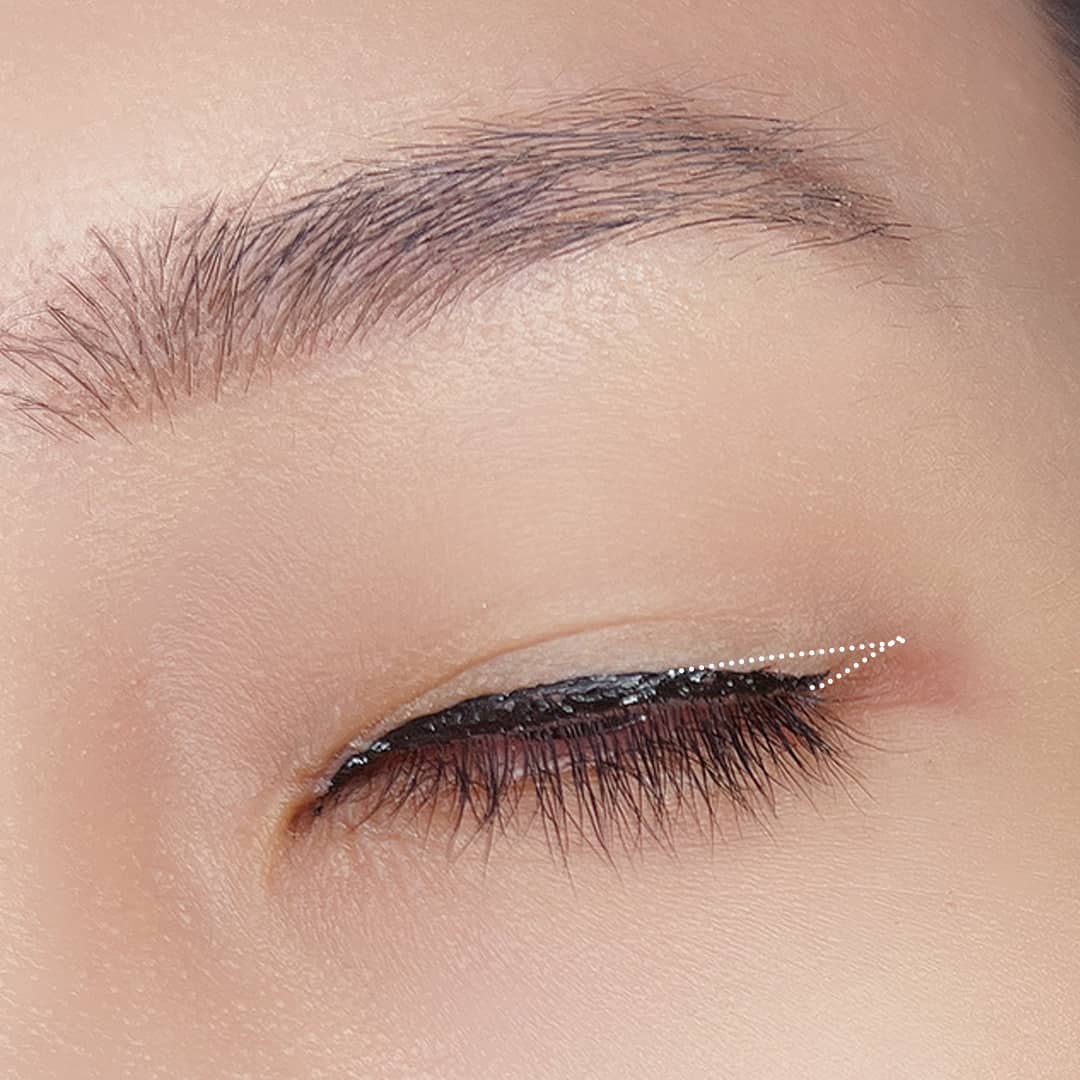
Eyeliner Too Short
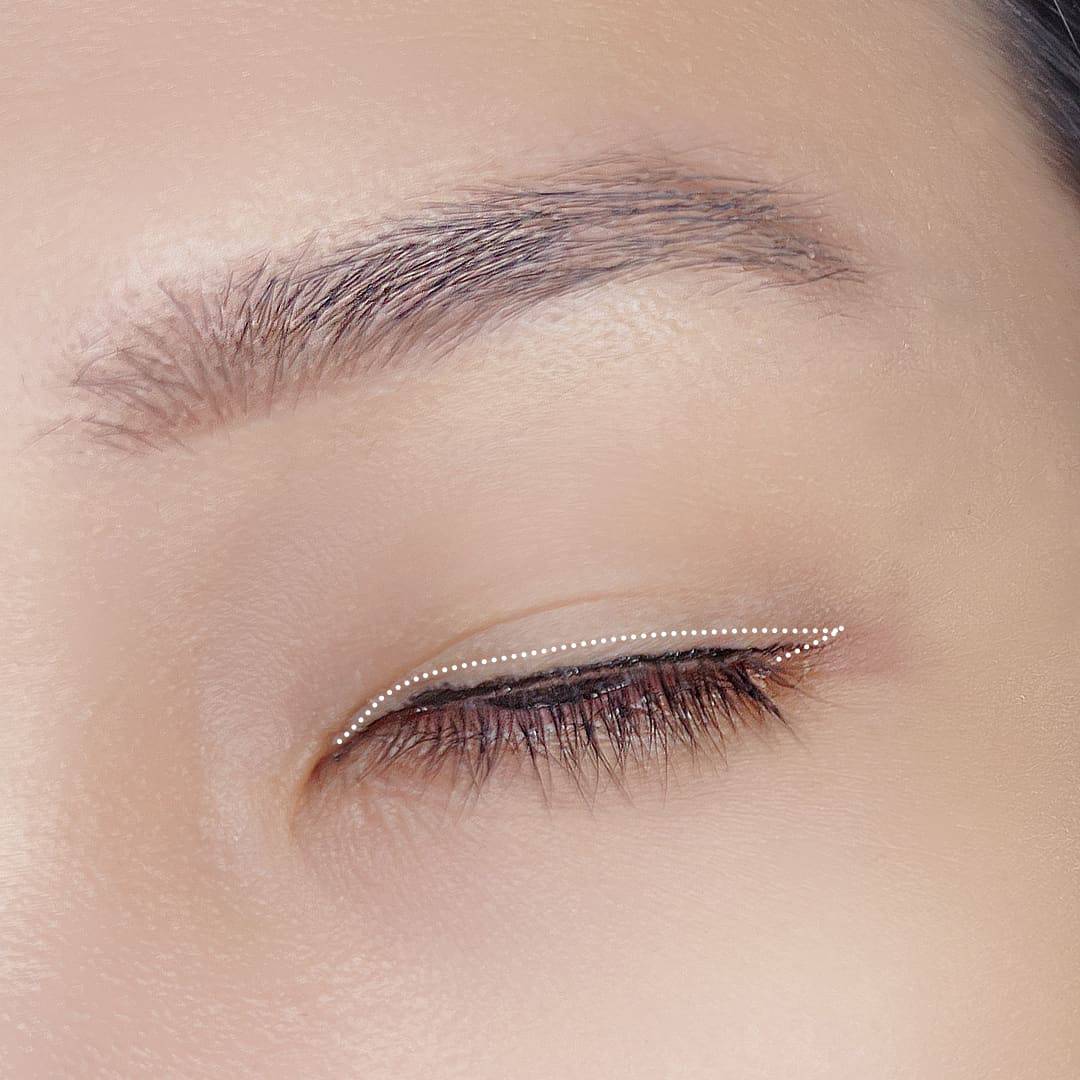
Eyeliner Too Thin
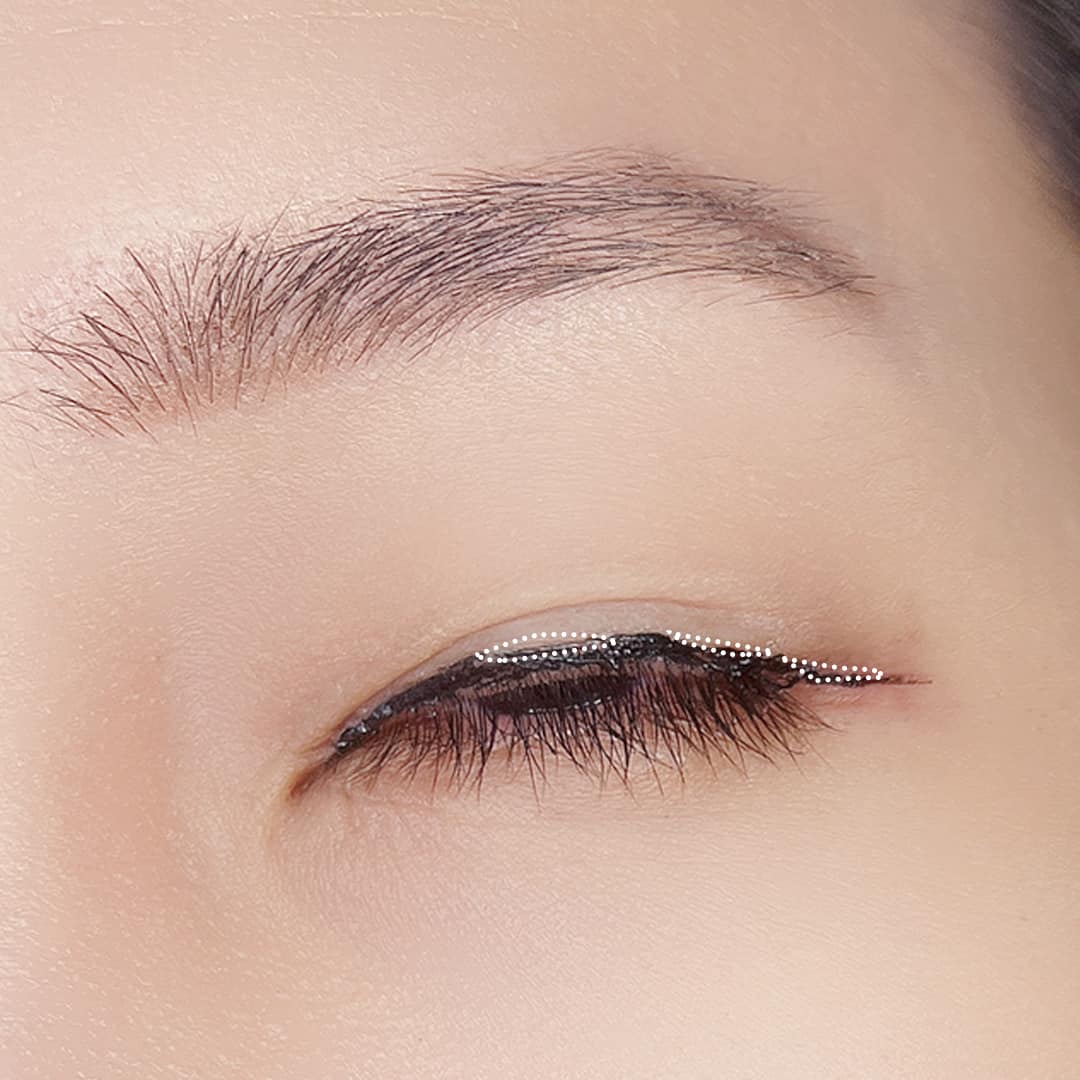
Eyeliner Uneven / Broken
Then allow the eyeliner to dry for at least 60 seconds.
Note: The eyeliner will feel tacky when it is dried. This is normal. "Tacky" may feel like it is not fully dried, but it is. A good test is to gently touch the eyeliner. No eyeliner should be on your fingers when it's ready.
OPTIONAL: For extra hold and if you are super kiasu like me. Then you could add another layer of magnetic eyeliner after the first one has dried.
#5 Bring lashes close and Attach to lash line
Here is where the magic happens.
If this is your first time, you will experience how the lashes simply put on itself for you. A beautiful experience. One that could only be felt and not explained.
Now, take the lashes and position it close to your eyeliner. The whole lashes will snap onto the eyeliner. This can be a bit surprising for some.
You may want to position the lashes onto the lash line one magnet at the time. But the trick is to latch all 10 magnets onto the lashes at one go, then individually position/ adjust it into place.
Also take note of the angle where the lashes sit. You want it to be 45 degrees and not 90 degrees. A common mistake if this is your first time wearing any false lashes.
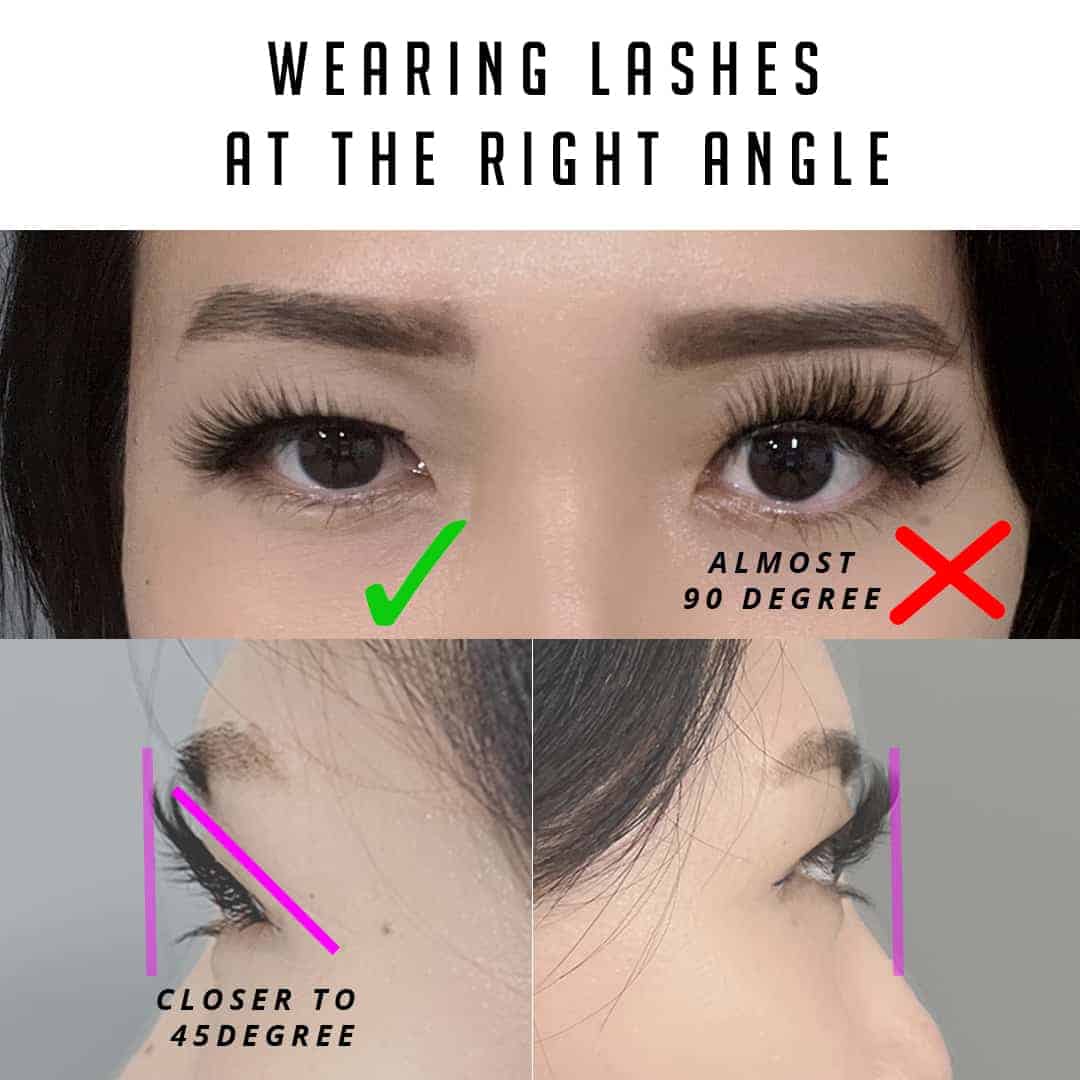
#6 Adjust the lashes into the perfect position
Position the magnet one by one, from inner edges to outer. Or the other way round, if you prefer.
When adjusting your lash, try sliding instead of pulling off. Pulling removes the eyeliner and causes that spot to lose magnetism.
To touch up weaker spots, simply dab the magnetic eyeliner onto any areas you want the magnets to be stronger. So much more easier than glue!
Do this and it will last all day long!
Want to make it look even better, try this.
Tried the steps above and the lashes are still not sticking? Visit this link: Why Does My Magnetic Lash Drop Off? Or chat with use: Here
Your turn
And you are done! Now is your turn to try it out.
Although magnetic lashes can be a little tricky at the start, once you get the hang of it, you will be a seasoned magnetic lash convert in no time.
Magnetic lash is more gentle on the skin. It does not irritate your eyes like glue. And it also makes taking them off easier. You do not need to yank them off your eyes. There are no glue clumps.
Want to learn more about magnetic lash? Here is: Magnetic Lashes: Everything You Need To Know.
